How To: Lungeing
Kirsty Farnfield & Bradley Carroll
Thu, August 3, 2000 7:23PM
Section B, Part 2: TACKING UP
The term "tacking up" refers to the process of fitting the equipment to the horse. Unlike the free-schooling method, which requires no special equipment, the conventional method requires the use of the cavesson, lungeing rein, lunge whip, and for safety you should also wear gloves and an approved riding helmet.
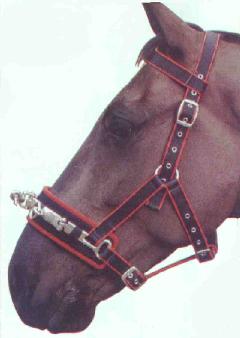
When lungeing, you can either just use a cavveson (fig. 1), which should be fastened
as tight as possible to prevent it slipping round and injuring the face, or you
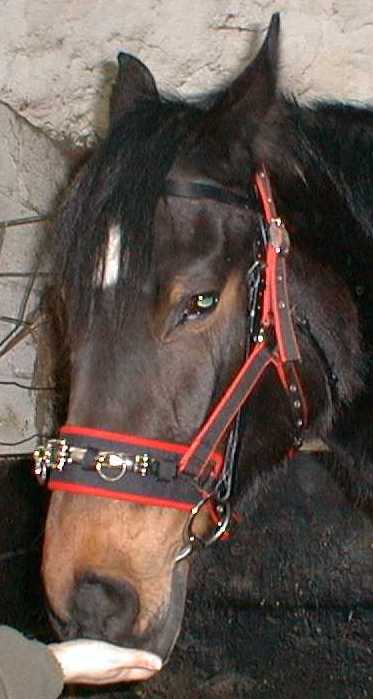
can use a cavveson over a bridle (fig. 2) if the horse is to be ridden as well, or
requires the side reins to be clipped to a bit.
Fig. 1
Fig. 2
If using with a bridle for exercise, not for giving a lunge lesson to a
rider, then the noseband and reins should be removed. If teaching a rider, the
reins should be left on, and only the noseband removed. Always clip the lunge
line to the centre ring of the three rings on the cavveson.
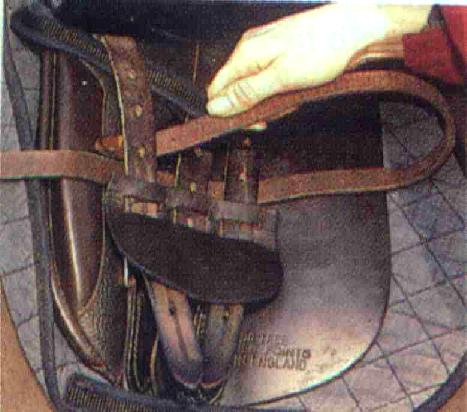
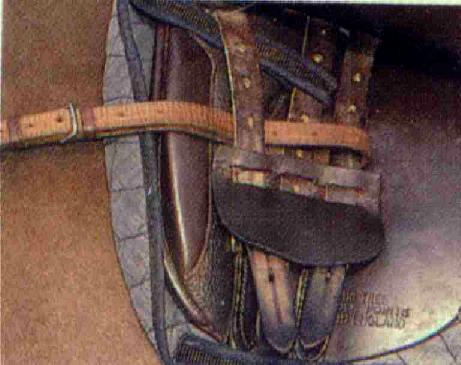
Side reins should be attached to the girth straps as shown in the pictures (Fig. 3 & 4) –
the girth should be fastened to either straps one and two, or one and three,
NEVER two and three, as they are on separate pieces of webbing, in case one
piece breaks the girth will stay on. The side rein should go under all the
straps, over the last strap (2 or 3) and under the first strap again.
Fitting Side Reins
Fig. 3
Fig. 4
Fig. 5
Fig. 6
When clipped to the bit, the reins should be taut only when the head is
perpendicular to the ground. DO NOT clip the side reins on when measuring them.
They must be of equal length. When not in use, clip the side reins onto the
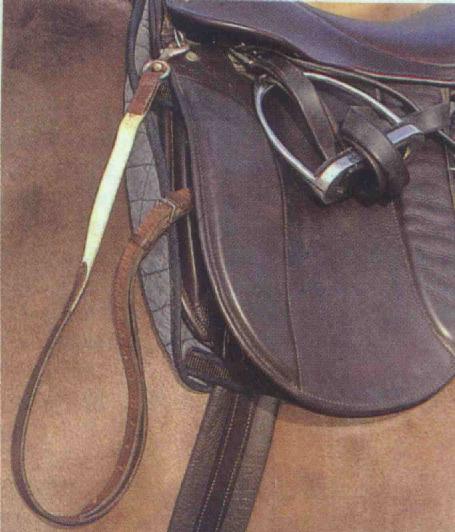
front D-rings of the saddle (Fig. 5). The horse must be warmed up and working long and
low before the side reins are clipped on loosely, and then tightened up as the
horse works on.
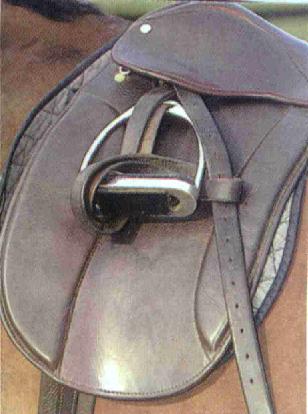
The stirrups should be secured with the leathers as shown (Fig. 5 & 6) to prevent them
from flapping around.